¶ Device Management
Device Management handles creating new device records, viewing device profiles, bulk operations, and integration with your MDM (such as Google Admin Console and other supported MDMs).
¶ Creating a New Device
You can add devices individually or in bulk.
¶ Single Device
- Go to Devices › Device Management and click Create New.
- Enter device details: manufacturer, model, asset tag, serial number, notes, BYOD indicator.
- Provide optional purchasing details (price, PO number) and warranty information.
- Click Add Device to save.
Note: Manufacturer, Model, Asset Tag, and Serial Number are required fields.
¶ MDM Import
This is the process for importing devices from any of the supported MDMs.
- From Devices › Device Management, click Download.
- If multiple MDMs are configured, select which MDM to download from. Otherwise, continue with step 3.
- Select the Groups/OUs to import devices from.
- Click Start. TDT-Asset will download Chromebooks from the chosen MDM and sync device information, then present a results page showing created/modified devices.
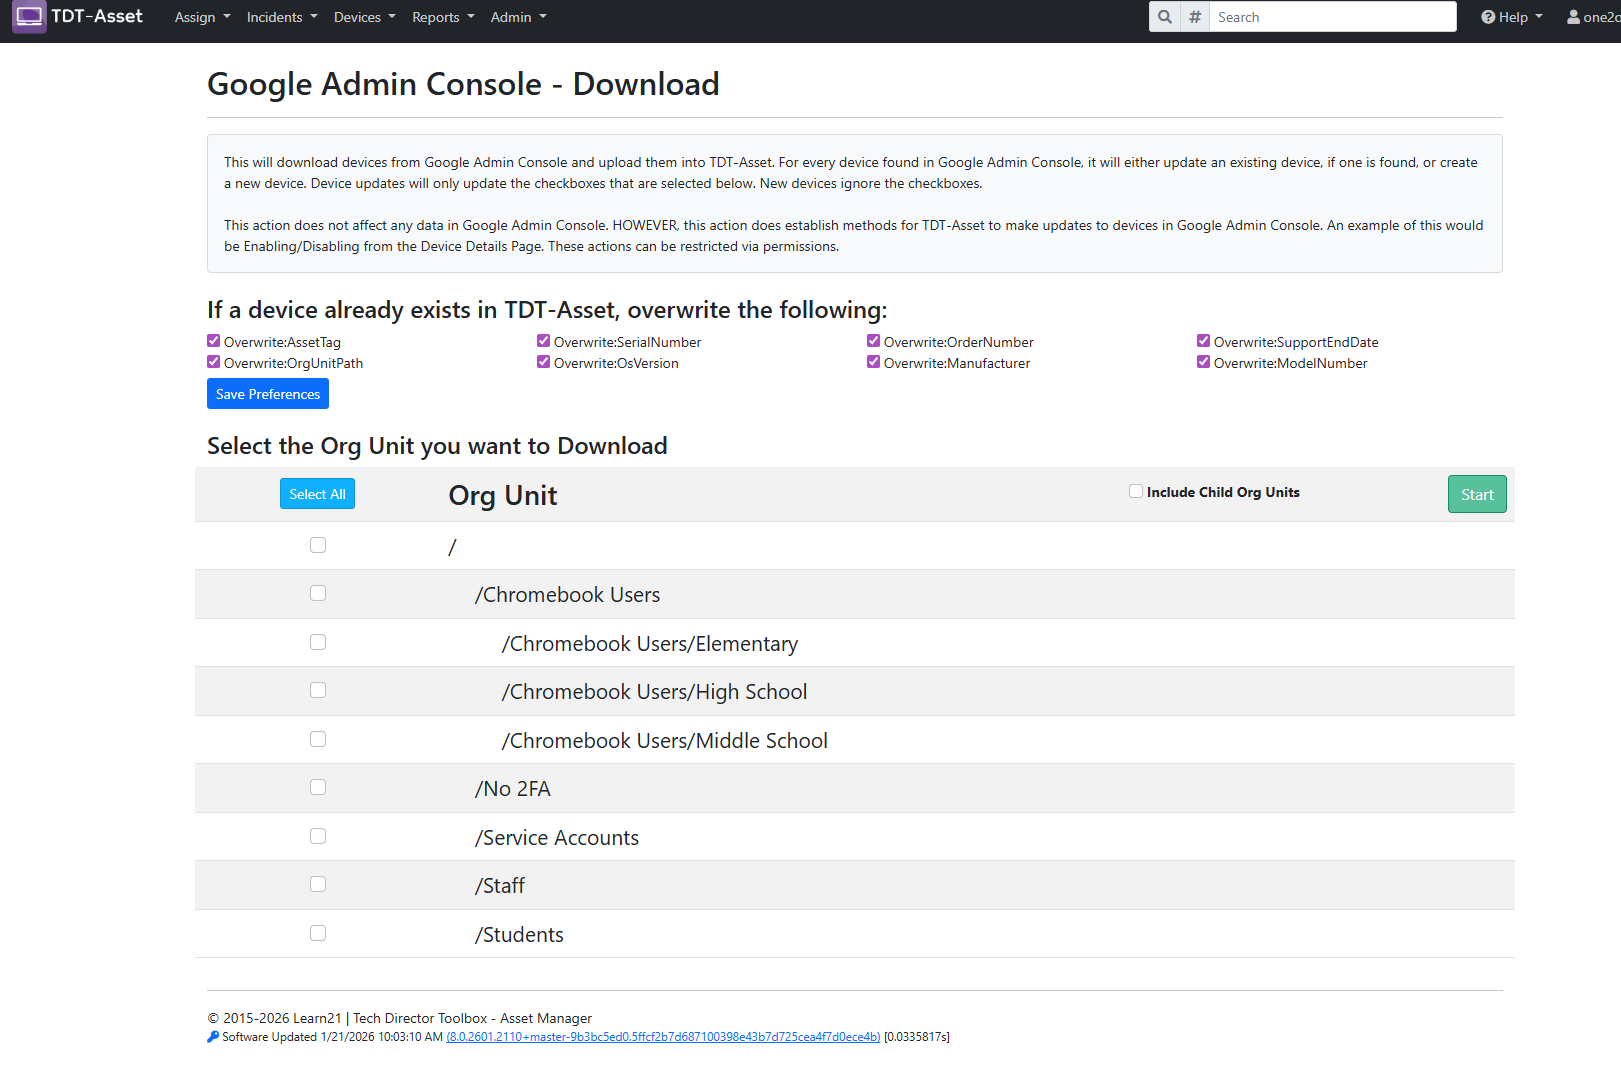
Importing devices via Google Admin runs in the background. Return to the download page to view results.
¶ CSV Upload
Use this workflow to create new devices or update existing devices in bulk from a CSV file.
- From Devices › Device Management, click Upload CSV.
- Use the provided template to list devices—include required fields (asset tag, serial number, manufacturer, model). Optionally include warranty start and end dates if a warranty type is selected.
- Upload the completed CSV and choose a warranty type or select No warranty.
- Click Upload Devices.
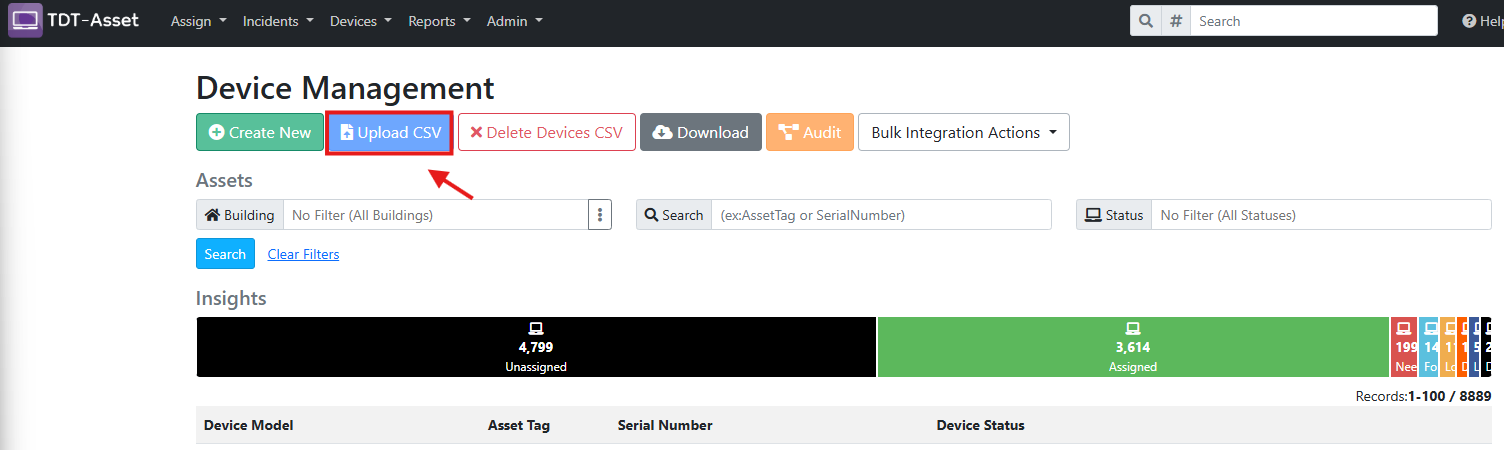
Tip: Only one warranty type can be applied per CSV.
¶ Device Profile
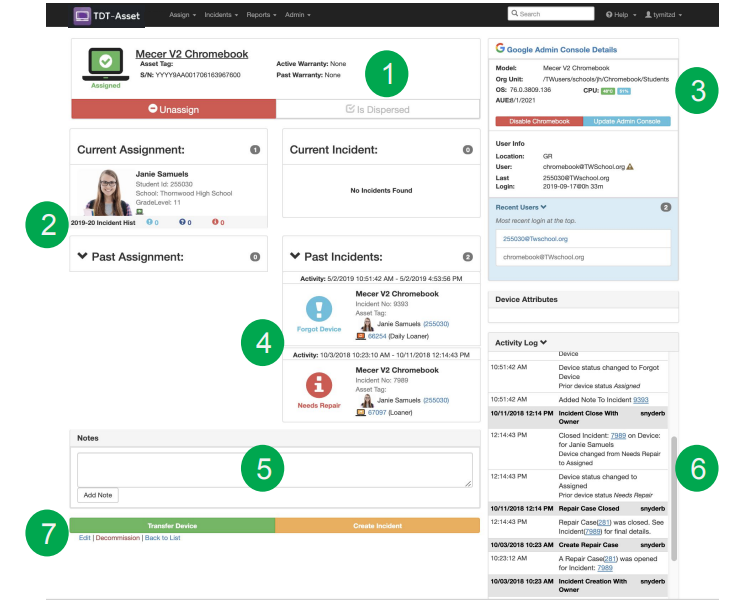
Use the universal search or browse the Device Management screen to locate a device. The device profile shows:
- Device Details – asset tag, serial number, building, and other information about the device.
- Current & Past Assignments – list of owners.
- MDM Information – information and actions for the specific MDM, such as the Google Admin Console.
- Open and Closed Incidents – incidents associated with the device.
- Device Notes – record notes specific to the device.
- Activity Log – detailed history.
- Device Actions – transfer, create incident, edit details, or decommission.
¶ Bulk Delete Devices
Bulk deletion removes devices permanently.
- Create a CSV file containing asset tags or serial numbers of devices to delete.
- Navigate to Devices Device Management and click the Delete Devices CSV button.
- Click Browse and upload the file.
- Click Delete Device Permanently.
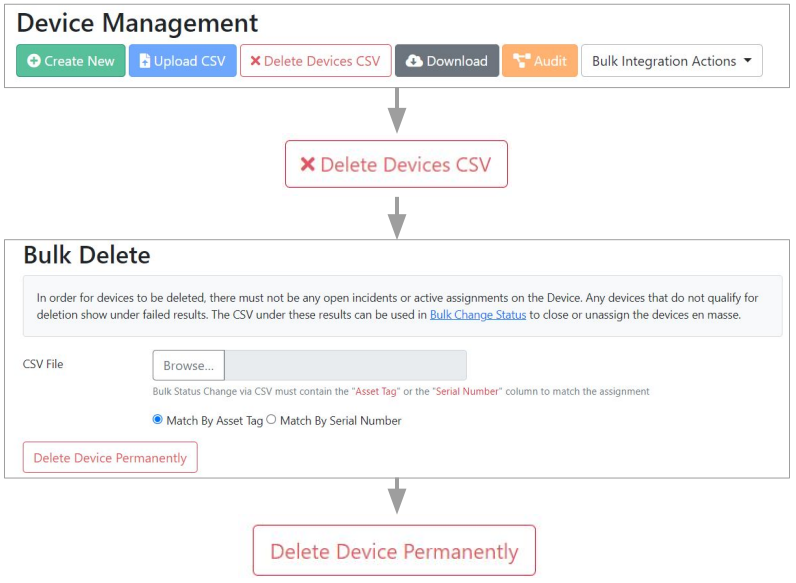
Warning: Bulk deletions cannot be undone. To recover devices contact Learn21 support.
¶ Warranty Management
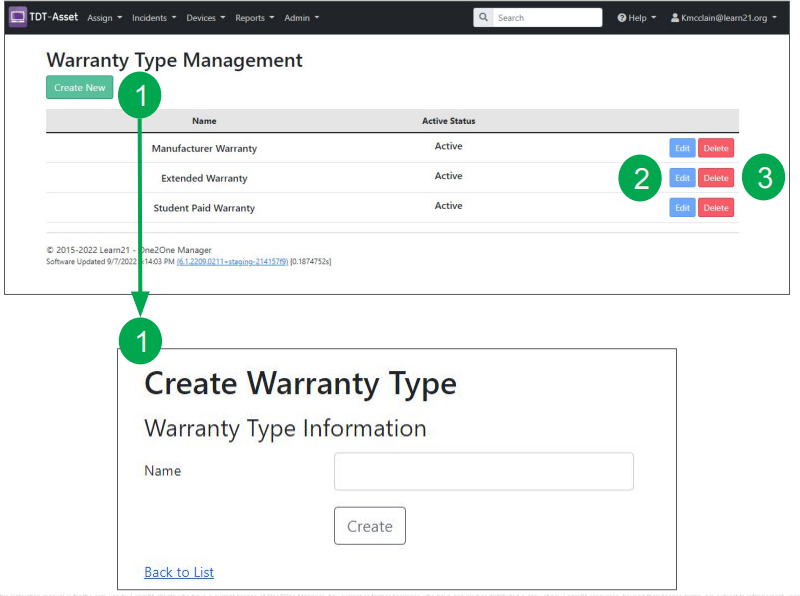
Warranties define coverage periods that can be applied to devices, helping you track repair eligibility and replacement costs. Configure your district's warranty types once, then apply them to devices individually or in bulk during CSV upload.
- Go to Admin › Device › Device Warranties to create, edit, or delete warranty types.
¶ MDM Dashboard & Audit
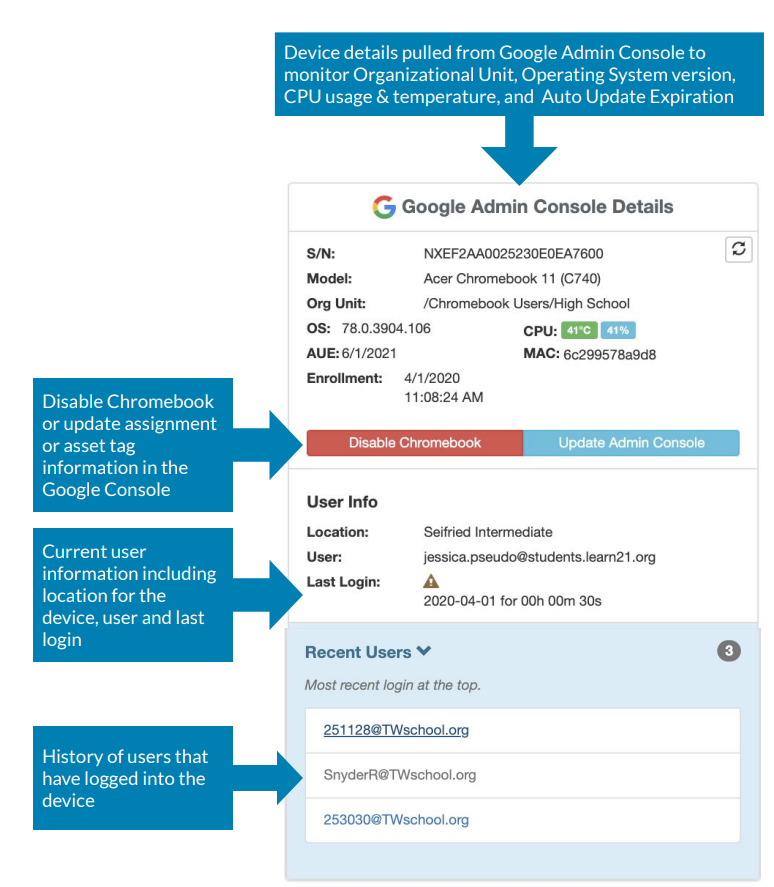
The MDM Dashboard within the device profile shows details synced from the configured MDM, such as organizational unit, OS version, CPU usage, and login history. Google Admin Console is currently the only MDM that supports write-actions back into the MDM (for example, disabling a Chromebook or updating its assignment from this dashboard).
To reconcile discrepancies between TDT-Asset and the MDM:
- Access Devices › Device Management › Audit.
- Select the organizational units to audit and click Start.
- Review results grouped by Need Manual Updates, Correctable Devices, and potential concerns flagged during the Audit.
- Expand sections and follow prompts to fix devices.
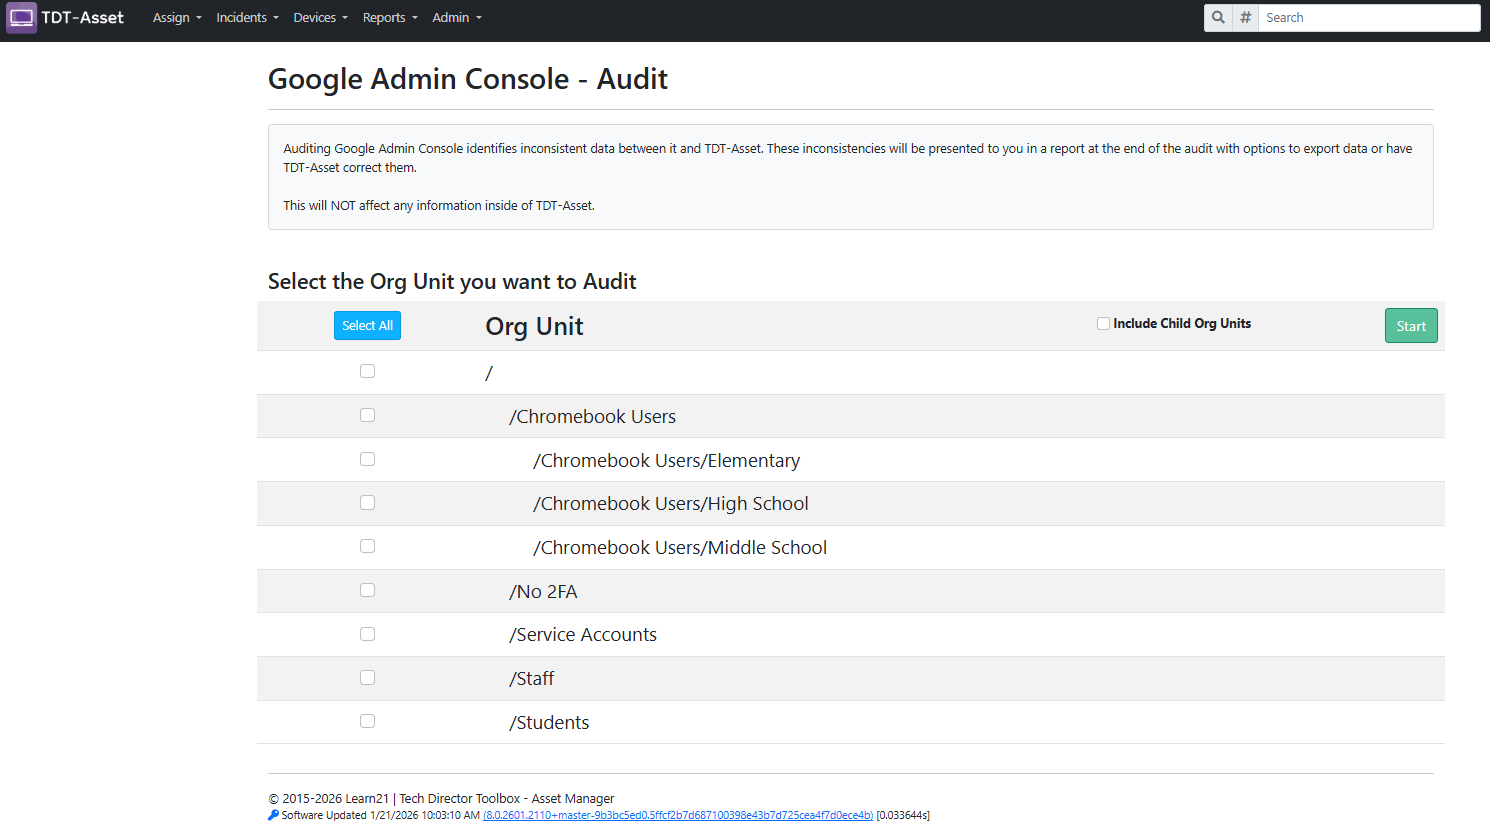
The audit runs in the background; return to the Audit page to view results.