¶ Tickets
This section explains how to view, create and manage tickets in TDT‑Helpdesk.
¶ Single Ticket View
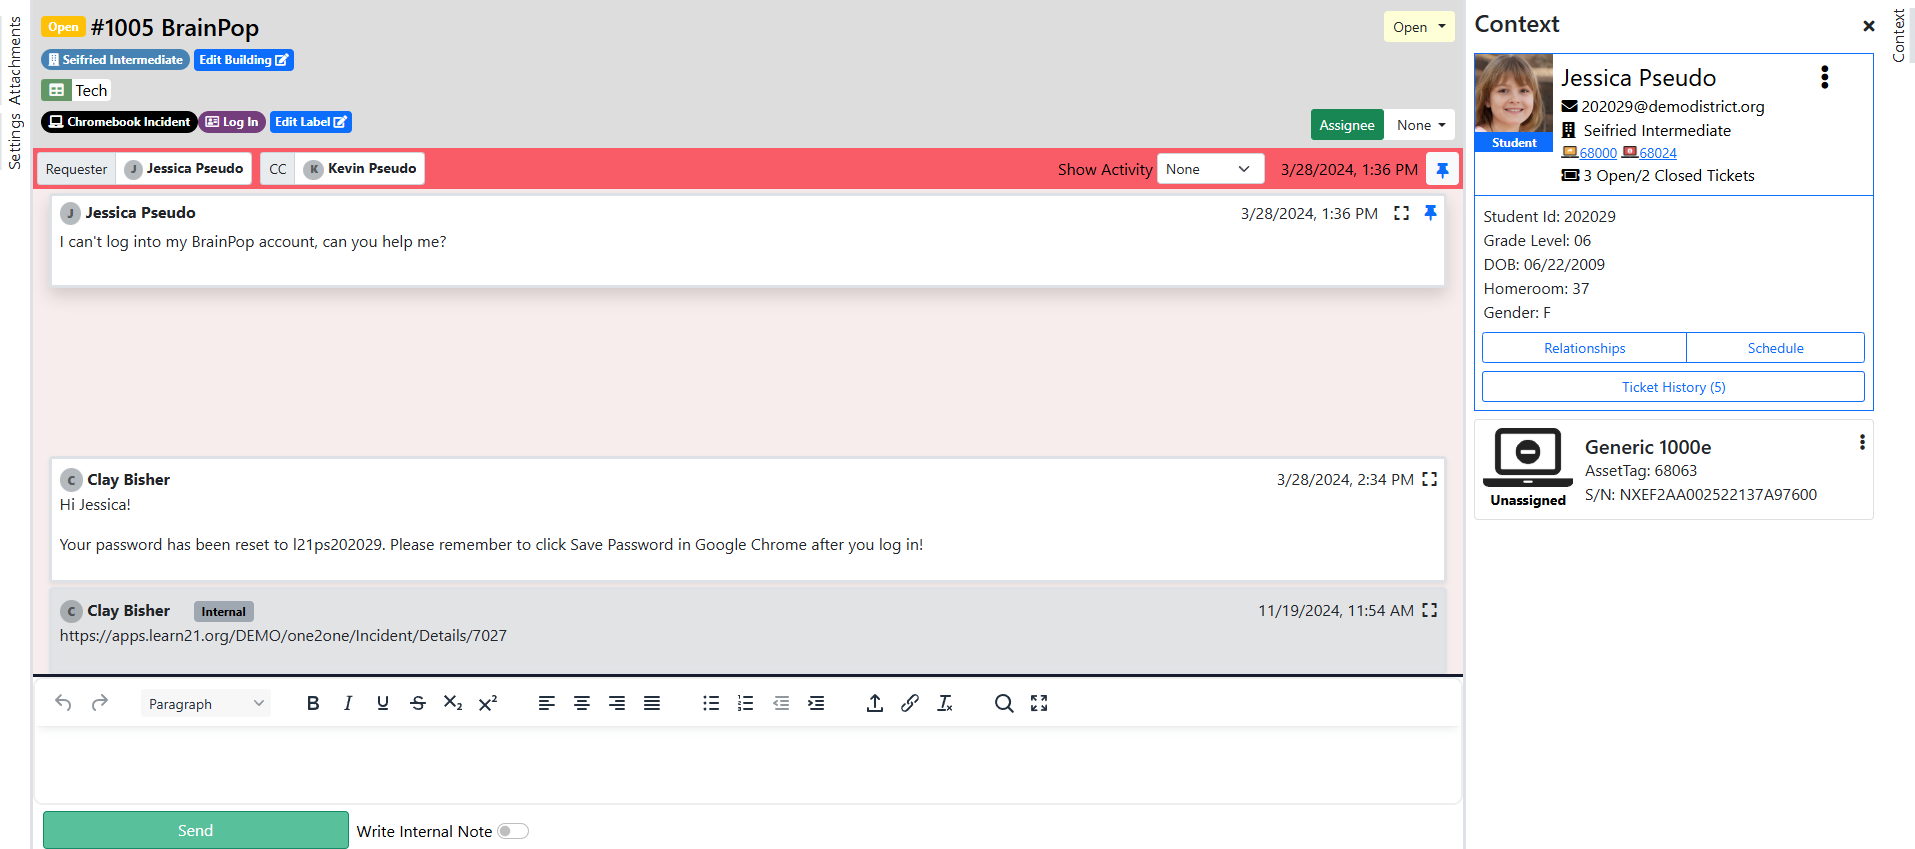
When you select a ticket you are taken to the Single Ticket View. From here you can reply to and edit the ticket. If your SIS integration or the TDT‑Asset module is enabled, additional information about the end user appears.
By default, any text you type sends an email to the end user. To add a message without emailing the requester, click Write Internal Note.
¶ Ticket information and actions
On the top left you’ll see the ticket ID, status and subject, along with any assigned building, department and labels. The top right provides options to change the status (Open, Waiting or Closed), merge tickets, and assign the ticket to an individual or group. Enabling the Show Activity tab reveals a history of changes made by technicians.
A Settings tab lets you change the requester, CC field and other ticket information. A separate Attachments tab collects all files sent and received. You can silence notifications for a specific ticket or remove it entirely.
¶ Merging Tickets
To merge a ticket, use the dropdown in the top right of the Single Ticket View and select Merge. You will be prompted to search for a target ticket to merge into. The current ticket's messages will be combined into the target ticket, and the merged ticket will be closed.
¶ Context tab
The Context tab on the right side displays information from your SIS about the end user. It may include parent/guardian details and schedules. The ticket history is available for quick reference. If you use the TDT‑Asset module, the context tab also lists the user’s devices and their statuses, and a vertical ellipsis provides quick access to asset actions.
¶ Tasks tab
The Tasks tab on the right side of the single ticket view allows you to create and manage tasks associated with the ticket. Tasks can be assigned to technicians and tracked independently of the ticket thread.
¶ Ticket List View
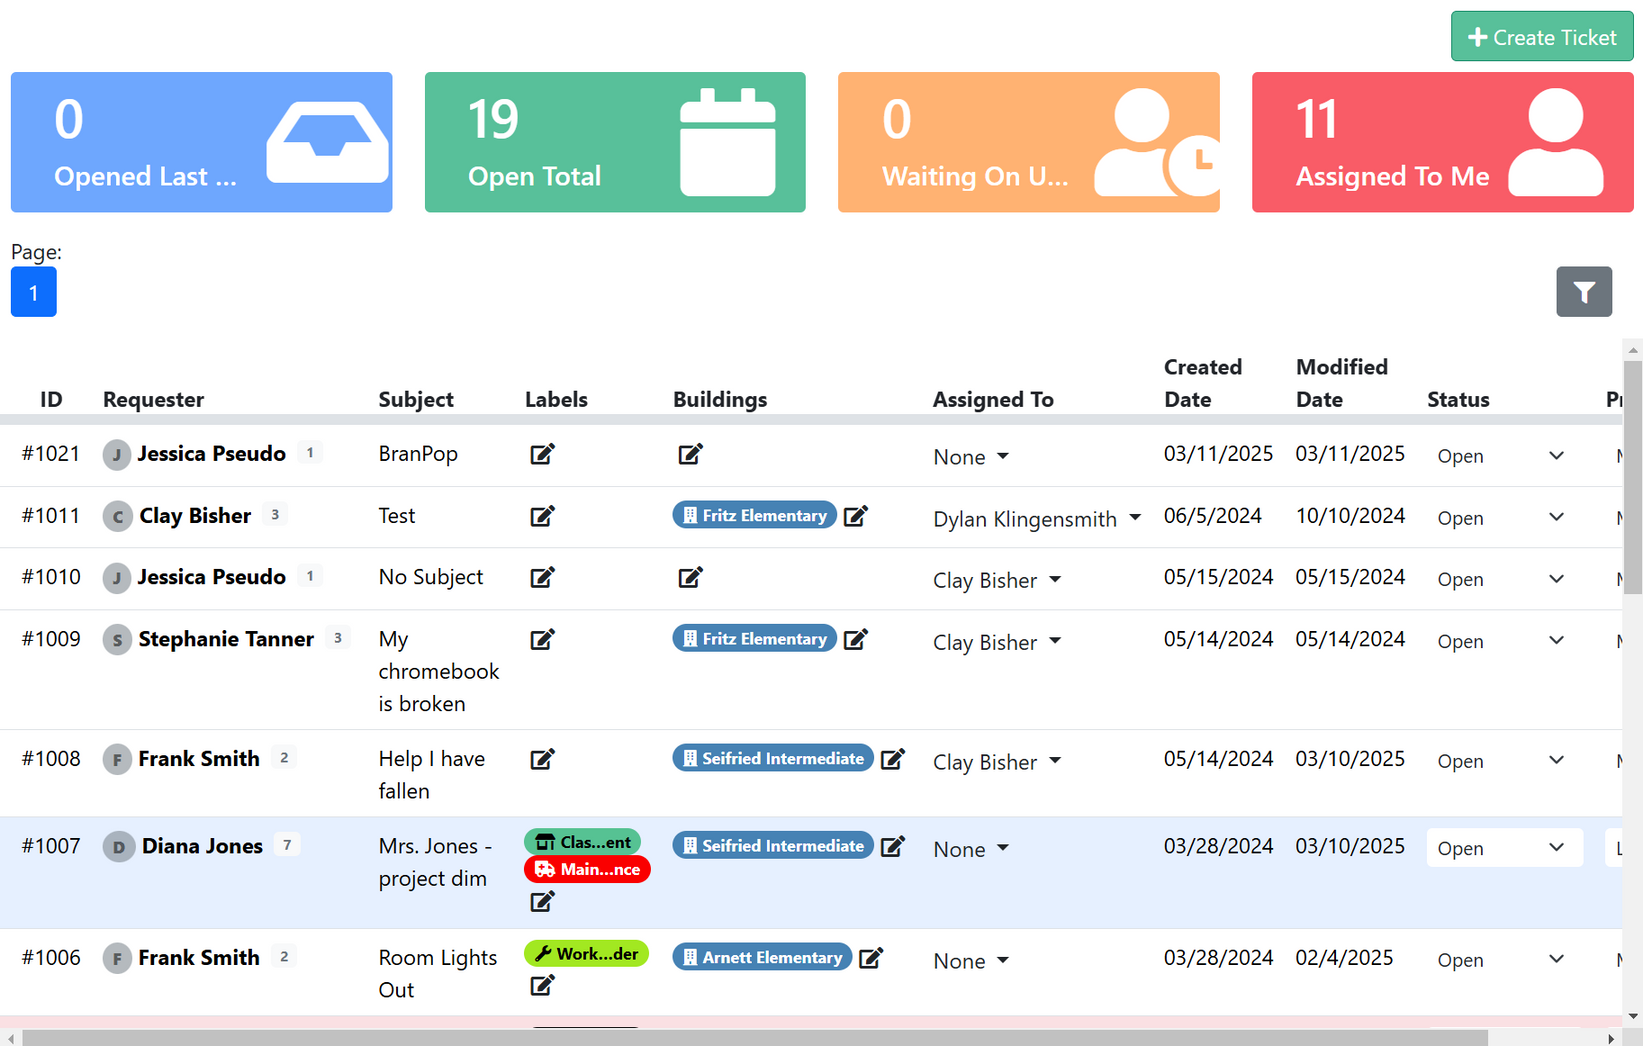
The Tickets tab displays the list of tickets and helps you navigate quickly. It returns you to your last used ticket views and allows you to create a new ticket or edit your pinned views.
¶ Creating a Ticket
To create a new ticket, click the New Ticket button from the Ticket List View. When you create a ticket on behalf of someone else by entering their email in the Requester field, the end user receives an email notification; the submitting technician's message becomes the first message on the ticket.
¶ Ticket Views
Ticket views allow you to filter and organize tickets in different ways. There are three types of views:
- My Views – personal views visible only to the technician who created them.
- District Views – shared views visible to all technicians or those in a selected department.
- Public Views – views created by other technicians that you can subscribe to; subscribing adds the view to your list automatically.
¶ Creating a ticket view
Click Create Ticket View to start a new view. Choose the view type, give it a name and optionally assign it to a department. You can add multiple filters to define which tickets appear. After creating the view, you can edit it at any time.
¶ Ticket view notifications
Each ticket view has its own notification settings. Right‑click the view and select Notification Settings to choose which event types generate email notifications.
¶ Pinned ticket views
Four pinned views appear at the top of the main page by default. You can edit or rearrange them in Tickets → Pinned Ticket Views. Edit mode lets you pick which views to pin and assign custom icons and colors.
¶ Filtering within a ticket view
To narrow down a ticket view further, use the Filter button to add or remove filter options. When filters are active a “Filters Active” box appears. You can click Save to store the view with the new filters.